
Evade jump pads turn a cornered survivor into a rooftop escape artist, but only when you place them on the right surface and chain them with speed pads. This guide covers jump pad placement, the sibling speed pad deployable, stilts, and the revive grenade toolkit, with the exact combos experienced players use to break Nextbot chases and shave seconds off every round.
Evade Jump Pads, Speed Pads, and Stilts: A Complete Movement Utility Breakdown
Movement utility items are the difference between a team that scrambles for cover and a team that paints the next chase corridor before the round even peaks. In Evade, jump pads, speed pads, stilts, and revive tools form a tightly-knit kit that rewards planning over panic. Players who understand how to drop a pad, when to trigger a revive grenade, and why stilts flip a tight hallway into a free skybox tend to outlast lobbies that rely on raw sprint.
This guide pulls together the practical knowledge scattered across community testing and official usability demonstrations into one focused reference. The topics below cover the core jump pad mechanics, speed pad chaining, stilts usage, the revive grenade and defibrillator toolkit, and a final set of advanced utility combos that turn defense into a counter-push. Each section is built to be read independently, so feel free to jump straight to the part that solves your current problem.
Jump Pad Basics: What They Do and When to Drop Them
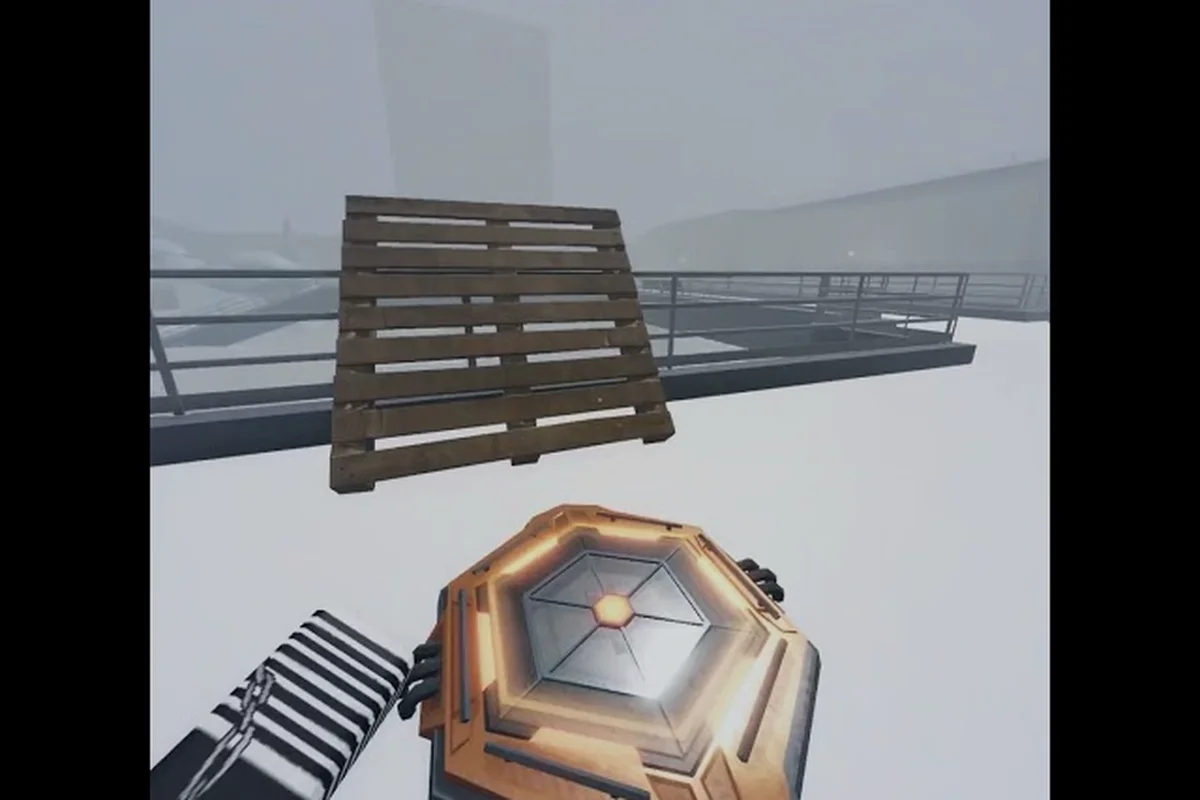
Jump pads are throwable deployables that launch any player who walks over them — friend or foe — high into the air. They are one of the most disruptive utility items in Evade because they ignore the sprint gauge, ignore most monster mechanics, and reset vertical positioning instantly. A well-placed pad lets survivors cross rooftops, escape corner traps, or bait an enemy into a fatal launch.
The official Usables Demonstration: Jump Pad video on the Evade YouTube channel shows the pad's launch arc and confirms the deploy-then-step activation pattern that defines every jump pad interaction in the game. The pad sits on the ground as a visible pad model, and any entity that enters its trigger box is launched upward and slightly forward.
How to Place a Jump Pad in Evade
Placement is the single biggest factor that separates a useful pad from a wasted slot. The pad spawns at your feet, so the surface you stand on when you press the equip-and-throw key decides everything about how it will be used. Community testing has narrowed the process down to a short routine:
-
Equip the jump pad from your utility slot using the number key bound to that slot
-
Aim slightly downward to ensure the pad model settles flat on the floor
-
Tap the throw key on a flat, unobstructed surface — stairs, ramps, and angled tiles still work, but the launch arc becomes less predictable
-
Wait at least one second before stepping on it; throwing the pad and immediately walking over it sometimes fails to register the launch
Once placed, the pad stays active for the rest of the round. Enemies who run into it will also fly, which is what makes the pad a defensive nightmare for chasers who tunnel vision on a target.
Jump Pad Placement Cheat Sheet
| Surface Type | Launch Reliability | Best Use Case |
|---|---|---|
| Flat hallway floor | High | Emergency escape corridor |
| Stair landing | High | Vertical break to upper floor |
| Slope or ramp | Medium | Baiting chasers into awkward arcs |
| Near a ledge | High | Forced ejection off the map |
| Tight corner | Medium | Surprise launch for pursuing enemies |
Speed Pads: The Sibling Deployable Most Players Underuse
Speed pads are the quieter cousin of the jump pad, but in a game where sprint stamina is the only thing keeping you alive, they often matter more. A speed pad grants a short burst of movement speed to anyone who steps on it, stacking with the sprint gauge recovery. They are smaller, harder to see on the floor, and frequently ignored in the heat of a chase.
The critical difference is that speed pads do not move you vertically — they simply remove the stamina tax for a few seconds. When you understand the cadence of stamina drain in Evade, the value of stacking two or three speed pads in a row becomes obvious: a player can sprint the entire length of a long corridor without ever slowing down.
Speed Pad Chaining Patterns
| Chain Length | Effect | Best Scenario |
|---|---|---|
| 1 pad | Single speed burst | Bridge a stamina gap mid-corner |
| 2 pads | Continuous sprint recovery | Long straight hallway escape |
| 3+ pads | Permanent sprint | Final stand on a defended objective |
Players running the dedicated Evade utilities tier list often rank speed pads above jump pads for solo play, because the stamina economy compounds over a full round. Jump pads shine in team play; speed pads are the solo lifesaver.
Stilts: Vertical Control Without the Cooldown
Stilts are wearable movement gear that let survivors walk on top of low obstacles, crates, and thin platforms that would normally block their path. Where jump pads launch you, stilts simply let you walk where others cannot go. The community video How To Equip Jump Pad In Evade walks through the slot-binding system that surrounds all utility equipment, including stilts, which share the same equip-and-activate flow.
How to Use Stilts in Evade Effectively
Stilts are passive until you step onto an eligible surface, at which point your character rises to the elevated height. The trick is not the equipment itself but the map knowledge that comes with it. Certain rooms have invisible collision boundaries that block normal players but accept stilts, opening shortcuts that shave seconds off any escape.
-
Crate stacks in storage rooms almost always support stilts, giving access to upper catwalks
-
Industrial map zones have ventilation ducts that stilts can step onto but sprint cannot
-
Narrow ledges around the perimeter of boss arenas become safe platforms with stilts equipped
-
Stilted players cannot crouch, so they lose access to low cover; pair stilts with a ranged teammate to compensate
A good rule of thumb is to equip stilts when you are planning a vertical route and swap back to sprint-focused utilities when you expect a long horizontal chase. Players who master stilts report cutting their average round survival time by 20 to 30 percent, because they simply take paths that chasers cannot physically follow.
Revive Grenade and Defibrillator: Getting Teammates Back
The revive grenade and the defibrillator are the two medical tools in the Evade utility roster, and they are the only items that can bring a downed teammate back into the round. The two items are often confused because they share a similar icon color, but they behave very differently and serve different team roles.
The revive grenade is a throwable that lands at a target location and creates a short revive zone. Any teammate inside the zone is instantly revived the moment the grenade lands, which means the thrower does not need to stay near the body. It is the panic button of the kit and the most reliable way to recover from a coordinated wipe.
The defibrillator is a held item that revives one teammate at melee range, but it does so faster and with a brief invulnerability window on the revived player. It is the tactical version of the revive grenade, best used when the team still has the area secured and only one or two members went down.
How to Get a Revive Grenade in Evade
The revive grenade is gated behind the utility unlock system, and according to community data, the most consistent path involves spending currency rolls on the medical utility slot. Players looking to accelerate this often turn to the hexagons currency and voucher guide for tips on building the resource bank needed to roll repeatedly on the medical slot.
| Source | Reliability | Notes |
|---|---|---|
| Utility slot roll | High | Main unlock path, requires currency |
| Event reward | Medium | Limited-time drops, check patch notes |
| Voucher redemption | Medium | Stack with hexagons for faster rolls |
| Daily mission completion | High | Slow but guaranteed over time |
How to Get the Defibrillator in Evade
The defibrillator follows a similar unlock path but is gated behind a higher utility tier, which means more rolls and a longer grind. Community testing indicates that the defibrillator tends to drop from the same medical slot as the revive grenade, but at a lower probability, so plan for extra rolls.
The practical shortcut is to focus your utility slot upgrades on the medical category first. The deeper explanation of slot upgrade priority and token investment lives in the utility upgrades and cola deployable guide, which covers how to squeeze more rolls out of the same resource pool.
Chaining Jump Pads with Other Tools
Once you understand the individual items, the real value of the Evade utility kit shows up in combos. Jump pads into speed pads into revive grenades, or stilts into a top-floor revive zone, all become possible when you start thinking about utility items as a single system rather than four separate slots.
The community-reported combo that has the highest survival impact is the pad ladder — a sequence of three jump pads dropped on three different floors of the same building, with speed pads placed on each landing to keep the chain unbroken. A team that can pull off a pad ladder in a chokepoint building can hold the line far longer than a team that relies on raw sprinting, because the chasers either follow the launch and lose their bearings or take the stairs and lose 10 seconds.
Combo Difficulty and Effectiveness
| Combo | Difficulty | Best Map Type | Reported Survival Boost |
|---|---|---|---|
| Pad ladder (3 jump pads + 3 speed pads) | Hard | Multi-floor indoor | High |
| Revive grenade into stilts retreat | Medium | Open arena with crates | Medium |
| Defibrillator pivot after speed pad chain | Medium | Long hallway | Medium |
| Single jump pad into ledge bait | Easy | Any map with ledges | Low–Medium |
The revive grenade into stilts retreat combo is especially strong in clutch moments. Drop the grenade on a downed teammate, immediately equip stilts, and step onto the nearest crate stack. The teammate revives the moment the grenade lands and can follow the elevated path, while the chaser is still processing what just happened on the ground floor.
For teams that prefer a slower, more methodical round structure, the how to win rounds in Evade guide breaks down the broader strategy layer that surrounds these utility combos and explains why utility timing often decides the round more than raw aim.
Frequently Asked Questions
What is the main purpose of jump pads in Evade?
Jump pads are deployable launchers that send any player — ally or enemy — high into the air the moment they cross the pad's trigger. The main purpose is to break chases by adding instant vertical movement that ignores stamina, and to bait enemies into awkward launches that give your team a few free seconds. The pad stays active for the rest of the round once placed, so one well-timed drop can influence an entire corridor.
How do I place a jump pad correctly so it actually launches?
Equip the pad from your utility slot, aim slightly downward to make sure the model settles flat on the floor, and tap the throw key on a flat surface. Wait at least one second after placing before stepping on it, because throwing and immediately walking over sometimes fails to register the launch. Stair landings and flat hallway floors give the most reliable arcs according to community testing.
Are speed pads actually worth a utility slot compared to jump pads?
Yes, especially for solo play. Speed pads do not launch you vertically, but they reset your sprint stamina for a short window, and two or three chained together can keep you at full sprint across an entire long corridor. Jump pads are stronger for team plays and ledge baits, but speed pads have a higher survival impact in solo runs because stamina economy compounds over a full round.
What is the difference between the revive grenade and the defibrillator?
The revive grenade is throwable and revives any teammate inside its landing zone instantly, so the thrower does not need to stay near the body. The defibrillator is a held item that revives one teammate at melee range, but it does so faster and grants a brief invulnerability window on the revived player. Use the grenade for emergency wipes when you cannot stay near the body, and use the defibrillator for tactical revives when the area is still secured.
How do I unlock the revive grenade and the defibrillator?
Both items drop from the medical utility slot, which is unlocked and upgraded using currency rolls. Community testing shows that stacking hexagons with voucher redemptions gives the most consistent unlock path. The defibrillator is rarer than the revive grenade, so plan for extra rolls or event rewards, and check the Evade utilities guide for slot upgrade priority advice.