
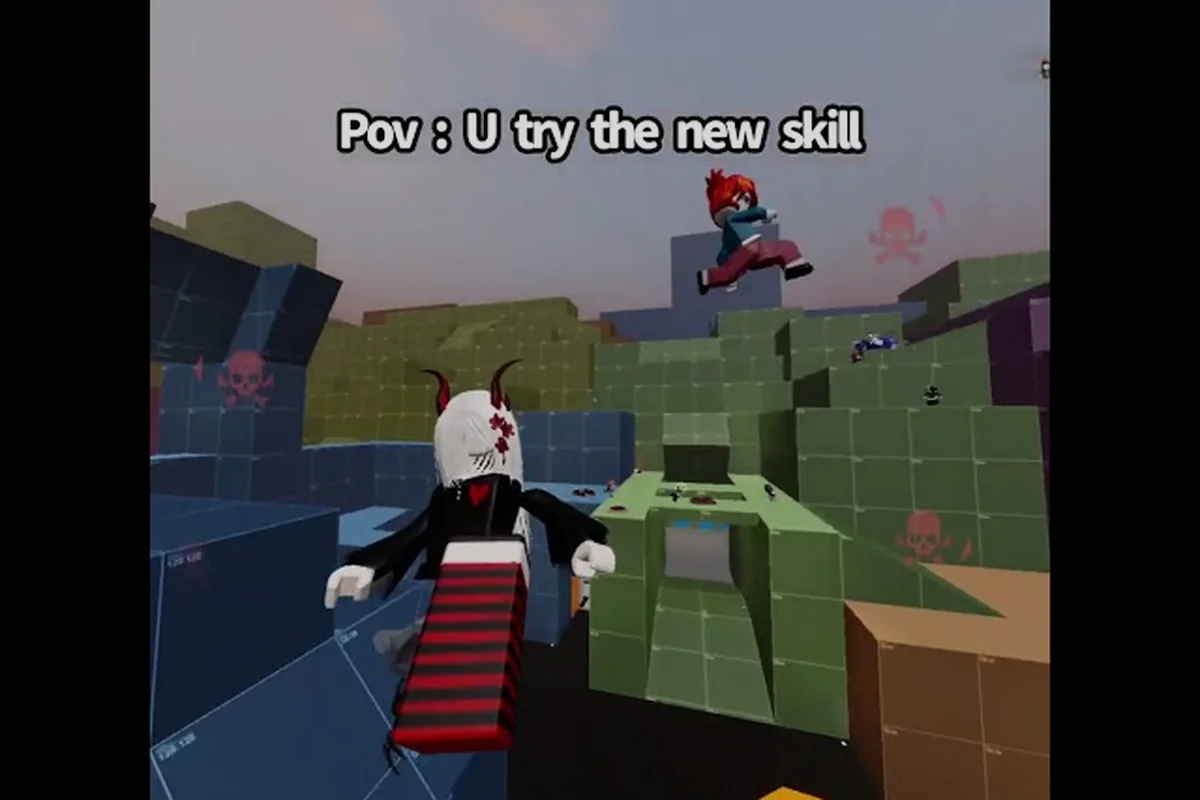
Most Evade rounds don't collapse because of raw speed; they collapse because the squad stops talking, stops reviving, and stops committing to a single survival plan. This Evade round guide focuses on the three habits that separate a one-win streak from a fifteen-win streak: clean callouts through the whistle, fast and safe revives, and squad plays that buy time instead of burning it. Inside, you'll find a step-by-step framework, the exact whistle inputs to memorize, and the revive priorities the community swears by when a Nextbot wave tilts the round.
The Round-Winning Mindset: Three Pillars That Decide Every Evade Match
Every squad that strings together long win streaks in Evade runs the same playbook without realizing it. The first pillar is callouts — without a callout, two teammates round a corner and the slower one eats a hit. The second pillar is revive tempo — losing a teammate costs stamina, time, and map space, so every second spent downed is a second the Nextbot gains ground. The third pillar is squad cohesion — splitting up to "cover more ground" almost always loses to a coordinated group that regroups at the same landmark.
The reason this matters is simple: Evade rounds are short enough that one bad 30 seconds ends a run, but long enough that one well-timed revive or one correct whistle can flip the whole thing. Players who treat every round as three repeatable systems — callouts, revives, regrouping — consistently post the highest streaks reported on the community leaderboards. The table below breaks down the cost of each pillar breaking down mid-round.
| Pillar | What It Controls | Cost If You Skip It | Cheapest Fix |
|---|---|---|---|
| Callouts (Whistle) | Direction, danger, regroup points | Wasted stamina, double chases, surprise kills | One-player leads, one-player calls |
| Revive Tempo | Squad count, stamina economy, second chances | Downed teammate times out, Nextbot closes distance | Revive Grenade + Defibrillator split |
| Squad Cohesion | Map control, escape options, split pressure | Caught alone in dead-end rooms, stamina wasted | 2-by-2 buddy pairs, regroup landmark |
Why Most Rounds Actually End
According to community data gathered from long-streak clips, the most common round-ending moment is not "we got outplayed by the bot" — it's "we split up, one person went down, and the revive came too late." The 3-minute round structure rewards squads that treat survival as a relay race rather than a free-for-all; the runner in front creates distance, the support in back creates options, and the caller in the middle ties them together. If you want a deeper breakdown of how each second of the timer works, our 3-minute round guide walks through the timer math in detail.
The mistake most new squads make is treating the whistle like a panic button instead of a planning tool. A well-timed whistle before turning a corner is worth more than three whistles after a teammate goes down, because pre-emptive callouts let the squad choose a better route instead of reacting to a chase. A post-death whistle is basically an obituary.
Mastering the Evade Whistle: Inputs, Callouts, and Squad Communication
The whistle is Evade's only built-in communication tool, and learning exactly how to use the Evade whistle turns random pings into real intel. By default, the whistle is bound to a key on PC and a button on mobile; pressing it once emits a short chirp that nearby teammates can hear through walls, and the pitch/direction acts as a rough "this way" pointer. The trick is that the whistle is not a voice line — it is a rhythm signal, and squads assign meaning to different whistle patterns.
The Three Whistle Patterns Every Squad Should Adopt
The community has settled on three core whistle patterns — single chirp, double chirp, triple chirp — that together cover roughly 90% of round situations, from regrouping at a safe landmark to calling a low-HP emergency revive during the final 60-second chase phase. Memorize the table below, drill it with your squad in a private lobby, and you'll never have to ask "what did that ping mean" again when a Nextbot is closing the gap and every second of communication matters.
| Whistle Pattern | Squad Meaning | When to Use |
|---|---|---|
| Single short chirp | "I'm here / regroup on me" | Lost a teammate, low stamina, safe landmark |
| Two quick chirps | "Nextbot spotted, direction X" | First sighting, before engagement, mid-run |
| Three rapid chirps | "Emergency, I'm down or about to die" | During chase, low HP, last 60 seconds of the round |
Whistle Etiquette That Wins Rounds
A whistle is only as useful as the squad's response to it. The first rule is one whistler per chase — when two teammates whistle at the same time, the squad hears noise instead of information. Designate a "caller" role in the lobby and rotate it every two rounds so everyone practices. The second rule is whistle before you turn, not after you panic — the warning window is the most valuable part of the callout, because it lets the squad reroute before the Nextbot is on top of them.
The third rule, and the one most squads ignore, is to whistle the regroup landmark, not your own position. Saying "come to me" when you're in a dead-end room just stacks two players in a trap. Instead, whistle at a known safe spot — top of a staircase, junction with three exits, a room with a closed door — and your teammate will understand the intent. This small habit is the difference between a coordinated retreat and a double wipe.
Even when the squad executes whistle etiquette flawlessly, individual loadouts still decide whether the team survives a full chase loop or burns out by round eight. A dedicated utilities guide breaks down every support item that pairs well with whistle-based play, including Hermes Shoes for closing the gap after a regroup whistle and the Defibrillator for clutch revives when a Nextbot downs a carrier mid-retreat. Pair those picks with the regroup-landmark calling rule above and you turn every whistle from a panic ping into a real round-winning rotation.
The Revive Economy: How to Revive Teammates in Evade Without Losing the Round
Revives are Evade's risk-versus-reward heart. A successful revive gives the squad a fifth body, more stamina to share, and another set of eyes on the Nextbot. A failed revive costs the reviver a stamina bar, locks both players in place for a few seconds, and often hands the round to whatever Nextbot is closing in. Knowing how to revive teammates in Evade the right way — when, where, and with which item — is the single biggest leverage point in a clutch round.
Revive Item Comparison
There are three revive-capable items in the current Evade meta, and each one fits a different squad role. Picking the right one for the situation is half the battle; the other half is knowing when not to revive at all.
| Item | Revive Type | Range | Best Used When | Risk Level |
|---|---|---|---|---|
| Defibrillator | Direct contact revive | Touch range | Teammate is safe, room is clear, timer allows | Low if corner is clear |
| Revive Grenade | Throw-to-revive | Medium arc | Teammate is mid-chase, you can't safely approach | Medium, throw accuracy matters |
| Hand revive (no item) | Free, manual | Touch range | Out of utility charges, very safe corner | High, takes longer |
When to Revive and When to Leave
This is the question that separates a clutch from a feed. Revive priority rule #1: if the downed teammate is in a corridor with no cover and a Nextbot is on radar, you almost always abandon the revive and regroup. A second downed teammate is a guaranteed round loss; a single solo player has a real chance of juking. Revive priority rule #2: if you have a Defibrillator charge ready AND the downed teammate is in a closed room, the revive is almost always correct — the door buys you the two seconds you need.
Revive priority rule #3: if the round timer is under 60 seconds, reviving becomes a stamina-vs-time calculation. A full revive takes roughly 4 seconds of standing still; if the timer gives you 50 seconds and the revive gives you back a teammate, the math works. If the timer gives you 30 seconds and the Nextbot is in the next room, the math does not work. This kind of split-second decision is exactly what the Defibrillator timing guide breaks down with frame-by-frame examples.
Stamina Cost of a Bad Revive
A failed revive attempt costs the reviver roughly one full stamina bar plus the 3-4 seconds of standing still during the wind-up animation. If the squad is already low on stamina, that single failed attempt can end the round even if the Nextbot doesn't catch the next person. The defensive habit is to always check stamina before committing to a revive — if you're under half a bar and the teammate is in a risky spot, the revive is probably a trap. Sprint to a safe landmark first, refill stamina at a vending station if one's nearby, and only then loop back for the revive.
If you're brand new to the revive system, start with the Defibrillator and forget the Revive Grenade for your first ten rounds. The Defibrillator is more forgiving because the contact range is obvious, and you'll learn the safe corner pattern before you have to worry about grenade arcs.
Squad Plays That Outlast Every Nextbot Wave
Individual skill wins a single chase. Squad plays win the round. The reason is that Evade's Nextbots are tuned to punish lone runners — they accelerate when they see an isolated target and they corner-predict when the target has no escape route. A two-player or three-player formation gives the squad redundancy: if one person stumbles, another covers. Below are the four squad formations that the long-streak community uses most often, ranked by difficulty and round impact.
| Formation | Player Count | Best Map Type | Difficulty | Round Win Rate Lift |
|---|---|---|---|---|
| Pair + Caller | 2-1 split | Small maps, Bedrooms, tight corridors | Easy | +12% reported |
| Triangle | 3 roaming | Medium maps, Rooftops, classic stages | Medium | +18% reported |
| Chain | 4 in a line | Large maps, summer stages, rooftops | Hard | +22% reported |
| Split + Regroup | 2-2 with timed meetup | Mixed pools, rotating events | Hard | +20% reported |
The Pair + Caller Formation
Pair + Caller is the best starting formation for new squads because it requires almost no coordination beyond "follow the caller." Two players stay glued together and act as a chase pair — when one goes down, the other revives or covers — while the third player hangs back 30 meters and acts as the long-range scout and caller. The caller is the only person allowed to whistle, the only person allowed to peek corners first, and the only person the pair watches for regroup signals. This formation is especially strong on small maps like Bedrooms where there is no room to spread out anyway; if you want to know which maps make this formation even more dominant, our map tier breakdown ranks every stage by squad-friendliness.
The Triangle and Chain Formations
The Triangle formation is the next step up: three players move in a loose triangle, each one 20-30 meters from the other two, with the third angle acting as the "out" if the Nextbot commits to one player. The advantage of the triangle is that the Nextbot can only chase one target at a time, so the other two players can either flank the chase or peel off to a safer landmark. The disadvantage is that without strict communication, the triangle collapses into three solo runners, which is the worst possible outcome.
The Chain formation is for large maps and four-player squads. Players line up in a single-file chain, each one 15 meters behind the next, and rotate the lead every 30 seconds. The leader is the bait, the second player is the support, the third is the safety runner, and the fourth is the caller and the dedicated reviver. This formation burns stamina faster than the others, but it gives the squad a built-in revive line and a built-in escape route. It is the formation most often used by squads chasing 20+ round streaks.
The Split + Regroup Rotation
Split + Regroup is the highest-skill formation because it requires every player to internalize a meetup landmark and a timer. The squad splits into two pairs, each pair covering a different section of the map, and they regroup at a known landmark every 90 seconds. The benefit is map coverage — the squad sees more of the stage and avoids the Nextbot more reliably — but the cost is that a downed player in a solo pair is a guaranteed loss if the other pair is too far away. This formation only works once your squad has mastered the revive tempo and the whistle patterns from the previous sections.
Advanced Round Strategy: Reading the Nextbot and the Timer Together
Once the basics are in muscle memory, the next step is reading the round in real time — interpreting the timer, the Nextbot's behavior, and your squad's stamina as one combined signal. The reason top squads post 15+ win streaks is not that they run faster; it's that they make better decisions in the last 60 seconds of a round, when the timer pressure and the Nextbot pressure stack.
The 3-Phase Round Model
Every Evade round breaks into three phases, and each one has a different optimal play. The table below maps each phase to its best squad play and its highest-priority action, but the real edge comes from understanding why those priorities shift: the Opening phase is a stamina-refill and intel-gathering window where the Nextbot spawns at fixed map markers, so scouting with single chirps lets your team commit to a safe-room rotation before cooldowns stack. In Mid-round, two-chirp whistle patterns coordinate Defibrillator revives inside locked rooms while the entity patrols predictable patrol lanes, and Endgame collapses into pure stamina conservation because the timer hard-caps at 60 seconds and any wasted sprint eliminates your last-stand window.
| Phase | Timer Range | Squad Priority | Whistle Pattern | Revive Rule |
|---|---|---|---|---|
| Opening | 3:00 - 2:00 | Map scouting, stamina refill | Single chirp at safe spot | Revive only if free, no risk |
| Mid-round | 2:00 - 1:00 | Cooldown management, rotation | Two chirps on Nextbot sighting | Revive with Defibrillator in safe room |
| Endgame | 1:00 - 0:00 | Stamina conservation, last stand | Three rapid chirps, regroup now | Revive only if it saves the round |
Stamina, Doors, and the Last 60 Seconds
The last 60 seconds of a round is where 70% of failed runs end, according to community-reported streak data. The reason is that squads enter the endgame with low stamina, scattered positions, and a Nextbot that has already learned the map's hot zones. The defensive habit is to conserve stamina in the mid-round so you have at least one full bar for the endgame sprint. The offensive habit is to regroup at a defensible landmark at the 1:15 mark, even if it means abandoning a chase, because five players in one room have a much better survival curve than five players in five rooms.
For a deeper look at how to structure your stamina routes across the full 3-minute timer, the movement fundamentals guide breaks down the door-slam, sprint-burst, and hide-in-corner pattern that pros use to stretch a single stamina bar across the endgame.
Adapting to the Nextbot Type
Not all Nextbots behave the same, and the squad's play should shift based on which bot is in the chase. A chase-heavy bot (like the corridor kings) punishes long sight lines and rewards door-slamming. A wall-hack walker punishes hiding in plain sight and rewards breaking line of sight with quick vertical moves. A slow meme bot punishes panic and rewards slow, deliberate jukes. Reading the bot and adjusting the squad's route mid-round is the single biggest skill gap between a 5-round streak and a 20-round streak.
Frequently Asked Questions
What's the fastest way to win rounds in Evade as a solo player?
Solo players win by being the caller, the reviver, and the runner all at once, which means prioritizing the Whistle for self-callouts and avoiding chases that burn more than half a stamina bar. Focus on small maps, hug corners, and use closed doors as revive-free shelter. Reported solo streaks rarely exceed 8 rounds, but the round-by-round survival rate is much higher when the solo player commits to a single safe route per round.
How do I use the Evade whistle to call out a Nextbot without panicking my squad?
The community standard is two quick chirps to signal "Nextbot spotted, look this way," followed by immediate movement away from the bot's line of sight. The key is to whistle once, move, and trust your squad to interpret the direction. Triple whistles should be reserved for genuine emergencies because they trigger a regroup reaction that can pull teammates out of position.
When should I revive a teammate and when should I leave them downed?
The revive-or-leave call comes down to three checks: is the corner safe, do you have a Defibrillator or Revive Grenade ready, and is the round timer above 60 seconds. If all three are yes, revive. If any one is no, regroup at a landmark and signal with a single whistle. A failed revive costs more than a single downed teammate, so the default action is always regroup first, revive second.
Which revive item is best for squad play — Defibrillator or Revive Grenade?
The Defibrillator is the safer default because its contact range is obvious and the revive animation is faster, which makes it ideal for indoor revives in closed rooms. The Revive Grenade is the higher-skill option for outdoor revives and chases, where the reviver can't safely approach but can arc a throw over a wall. Most squads run one of each so they can split revive duties by situation. The Defibrillator timing guide goes deeper into when each item wins.
How do I keep my squad from splitting up mid-round?
The cleanest fix is to assign a caller role in the lobby and rotate it every two rounds; the caller is the only player allowed to whistle regroup signals, and the pair follows the caller's landmark. Add a 90-second regroup timer as a squad rule, and punish breaks with a quick post-round review. Within three or four rounds, the squad self-corrects and the round win rate climbs noticeably.